01
Tell the Studio what you want
Begin with ordinary language, a picture, a rough sketch, an existing object, or a problem that needs solving.
Digitally generated concept scene
3D printing and fabrication
Explore the gear, bearing, multicolor puzzle, enlarged car, branded pieces, mechanical studies, and other finished work—then look behind each object at the challenge that had to be solved.
The DagonTEK Studio
You wanted an object—not weeks of guessing which software to learn, which material to buy, or why the last attempt failed. The DagonTEK Studio is being built to research that job with you, put the right tools to work, and carry the decisions from the first model through slicing, printing, cleanup and assembly. You direct the result; your teammate carries the preparation and keeps the project record ready for the next revision.
01
Begin with ordinary language, a picture, a rough sketch, an existing object, or a problem that needs solving.
02
Your teammate identifies the missing facts, recommends the practical path, and brings the important decisions back to you.
03
Inspect the model, scale, orientation, fragile areas, supports, material, fit, and assembly before printing.
04
Large designs are divided into printable modules, oriented, sliced, tested, corrected, and produced one section at a time.
05
The approved parts become a finished object you can use, demonstrate, improve, share, or build upon.
The job
01
Explain what it must look like, where it must fit, or what problem it must solve. The teammate asks for the missing measurement, material, or use.
02
The first geometry is a proposal. Compare form, dimensions, walls, holes, and clearances before the detailed work.
03
Rotate it. Look at the back, the underside, and the clearances. Catch a thin wall or a bad orientation before the machine runs.
04
Review size, material, finish, time, and estimated cost. Nothing goes to the machine until you approve it.
Another working model
Drag this digital DagonTEK model to see its underside, edges and shape. This is where inspection begins. The printed object still needs its own checks for finish, strength, fit and assembly.
Physical proof
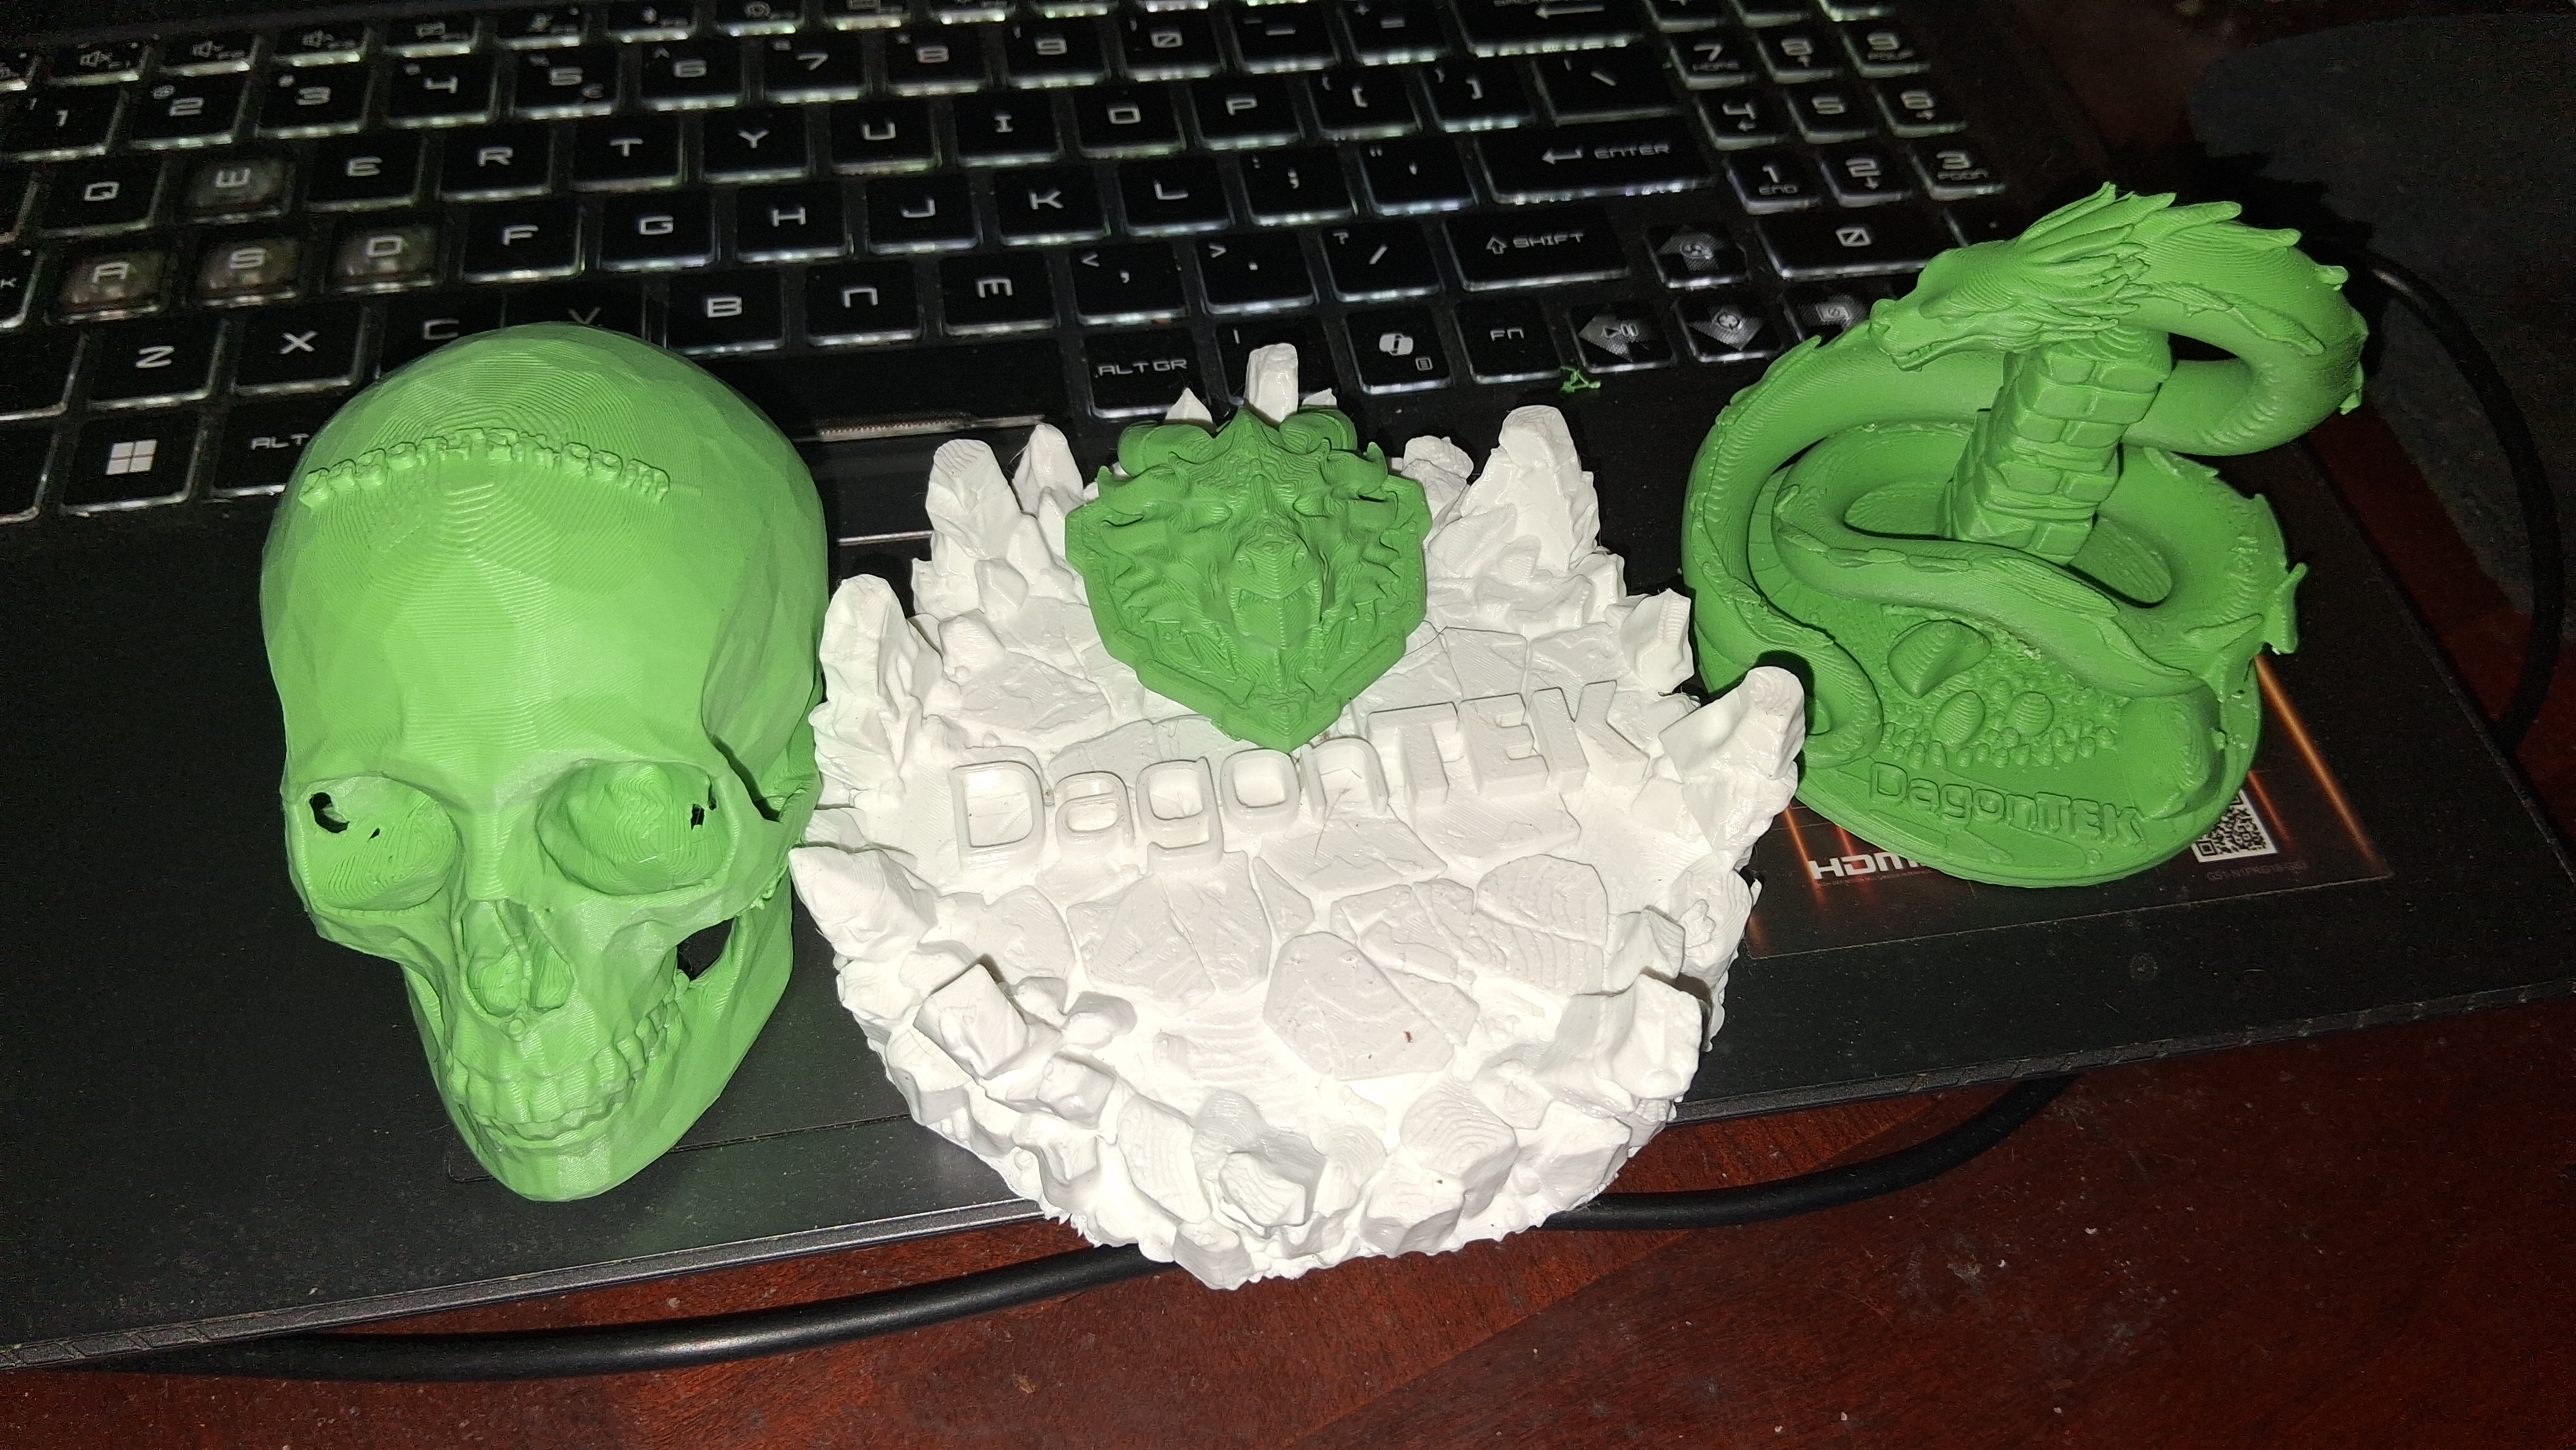
Character forms, branded displays, mechanical studies, multipart objects, and multicolor work have all come from this compact machine. Each finished object has its own reason for existing and its own challenge: color, motion, fit, scale, support, or assembly. Those objects—and the visible quality of the results—are the story.
Production note: current multicolor examples were made by hand on a Bambu Lab A1 mini without an AMS lite. Its build plate is 180 × 180 millimeters.
Future fabrication
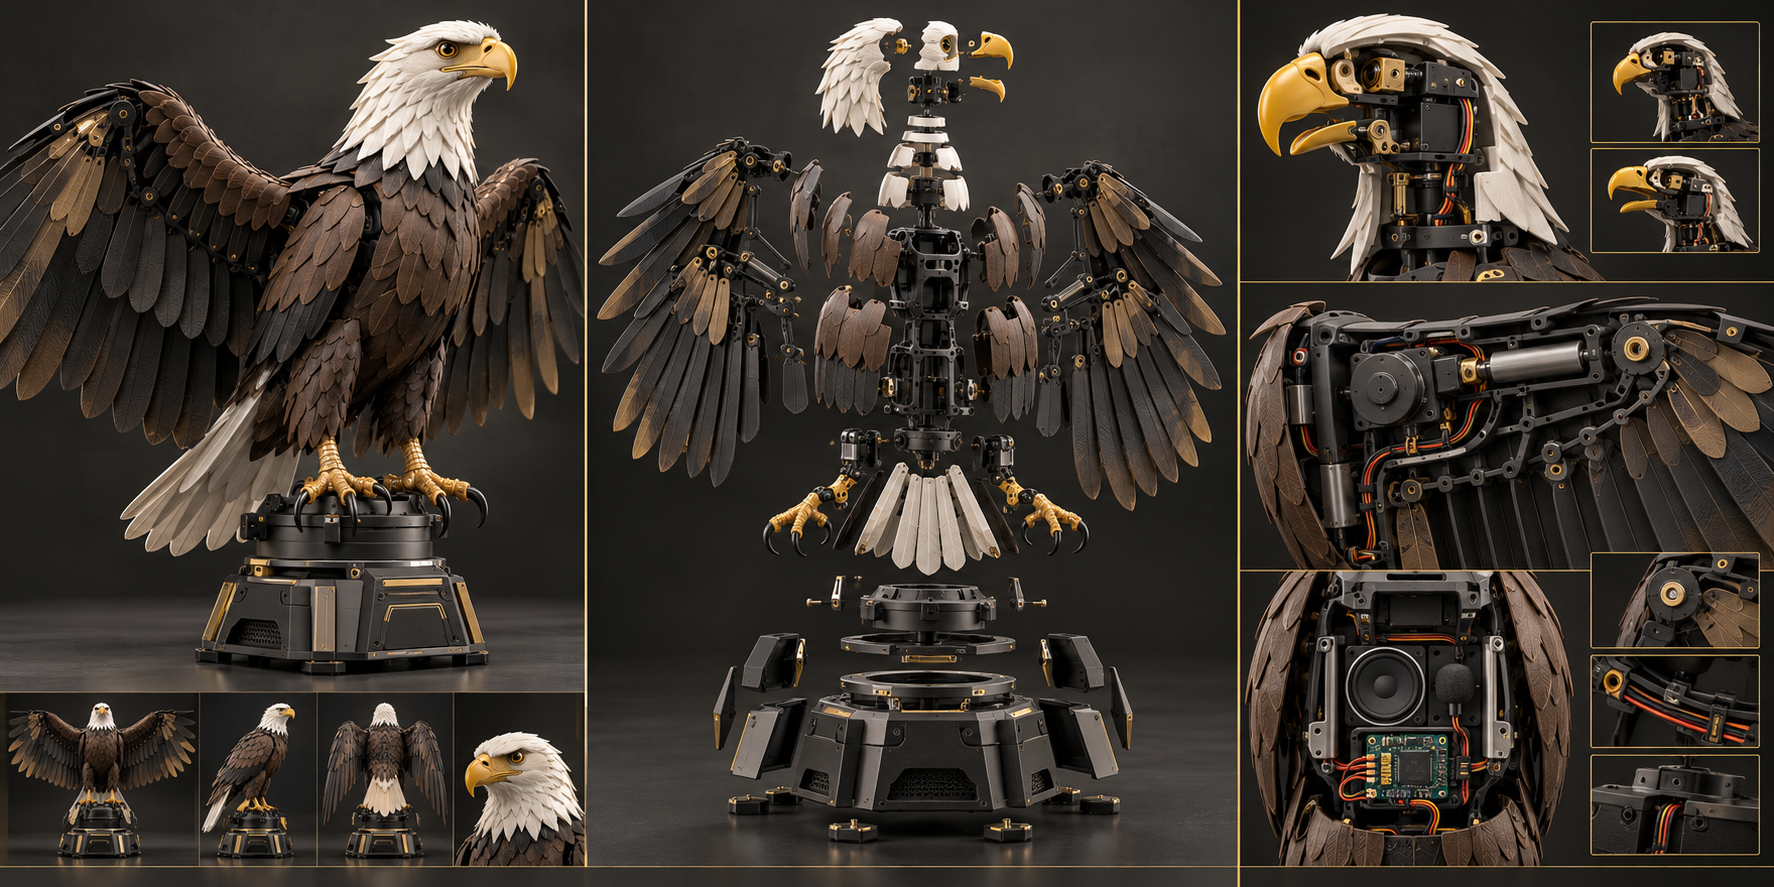
A compact desktop printer can produce something far larger than its build plate when the object is designed as a coordinated assembly. Eagle One brings fabrication, movement, sound, and character together in one dramatic concept.
Future project · Eagle One
Planned as a modular, serviceable display figure with a moving head and beak, expressive wing motion, feathered printed surfaces, synchronized eagle calls, lighting, and computer-controlled responses.
Eagle One demonstrates how individually printable pieces can become one large, animated object—designed for assembly, maintenance, presentation, and future expansion.
What would you create?
From the screen to the object in your hand
You found the design, learned the slicer and watched the tutorials. Hours later, the part has a rough underside or an edge that needs repair. That does not automatically make the design wrong: the cause could be preparation, material, machine behavior or cleanup. Finding out which one matters before spending another evening and another spool on the same mistake.
Too little support can let an overhang fail. Support in the wrong place can scar a surface or damage a small detail when removed. Orientation, contact points and removal need thought before printing. Then comes cooling, trimming, sanding and checking the part—not just admiring the screen preview.
The real nozzle, material, layer height and speed need to suit the job. A quick draft and a display piece have different goals. The Studio should check the selected setup, flag incompatible choices and explain the time, material and finish tradeoffs before you approve the print. The agreed choices belong with the job so the finished result can be compared with what you expected.
The DagonTEK Studio is being built to open the actual files, use the appropriate modeling and slicing tools, inspect scale and supports, compare alternatives and return a plan you can understand. You choose what matters—appearance, fit, strength, time or cost—and review the important decisions.
Try the cap. Assemble the halves. Check the joint and the moving parts. A cosmetic mark hidden by the final assembly may be acceptable; a weak joint may mean another print. Measurements, settings, photos and corrections belong with the project so the next session can continue from that record instead of asking you to explain everything again. The goal is less repeated setup, fewer avoidable mistakes and a more coordinated route to the object you wanted.
The above intended workflow is under development.